I recently found that I need a customized dns server to help me handle local area network hostnames resolve, rather than using 1.1.1.1, 8.8.4.4, 8.8.8.8 for public domain dns services. It turns out there’s one tool named dnsmasq that could help me solve issues like this. I’m not going really deep on how to use this tool, but to help readers to get started, readers could explore by themselves or to find other articles related to dnsmasq. In this post, I’m going to use macOS to illustrate how it works.
Installation
The normal way for installing dnsmasq is to use homebrew command line tool. The following is the command for installing the tool. For other operating systems, you could refer to the official website.
brew install dnsmasqIf you are using Mac, it is installed in /opt/homebrew/. It should be noted that it is a service that runs constantly in background, the following command shows how brew could control the service.
sudo brew services start dnsmasqSuper User privilege is needed to start or to restart the service. For Linux or Windows, please refer to other articles on how to control services for the specific platform. After the service is started, please check if it is working using the command:
sudo brew services info dnsmasqConfiguration
As stated in the beginning, I mainly want to illustrate the basic configurations. When installed via brew on Mac, the configuration is placed in /opt/homebrew/etc/dnsmasq.conf, it should be noted that there are lots of explanations in the conf file that are commented out, if you are really into this, you could have a look at them in detail.
The following code snippets shows the specific setup directory, dnsmasq would read the files within the defined directories. Specific configurations could be placed individually, which is very easy to manage the configruration contents.
# Include another lot of configuration options.
#conf-file=/etc/dnsmasq.more.conf
conf-dir=/opt/homebrew/etc/dnsmasq.d
# Include all files in a directory which end in .conf
#conf-dir=/opt/homebrew/etc/dnsmasq.d/,*.confSuppose one file is stored in the dnsmasq.d directory, with a file demo.conf, the following snippets show how to setup the dns server for specific url. In addition, a hostname could be mapped to specific ip address, this is handy when local area network hostnames cannot be resolved.
The following snippets shows which dns servers are used for the specific domains.
server=/apple.com/1.1.1.1
server=/wikipedia.org/1.1.1.1In addition, the following code snippets shows how to map hostnames to specific IP addresses, which functions the same as /etc/hosts file.
address=/demo.local/192.168.0.2
address=/demo.dev/192.168.0.2Those are the most important functions that you could use on a daily basis, to handle doamin resolution for public and local ip addresses.
Perks
For Mac, the most imporant part after setting up the service is to put the localhost ip on top of the DNS servers, shown as follows. It can be seen that the ip address 127.0.0.1 is placed on top of the list.
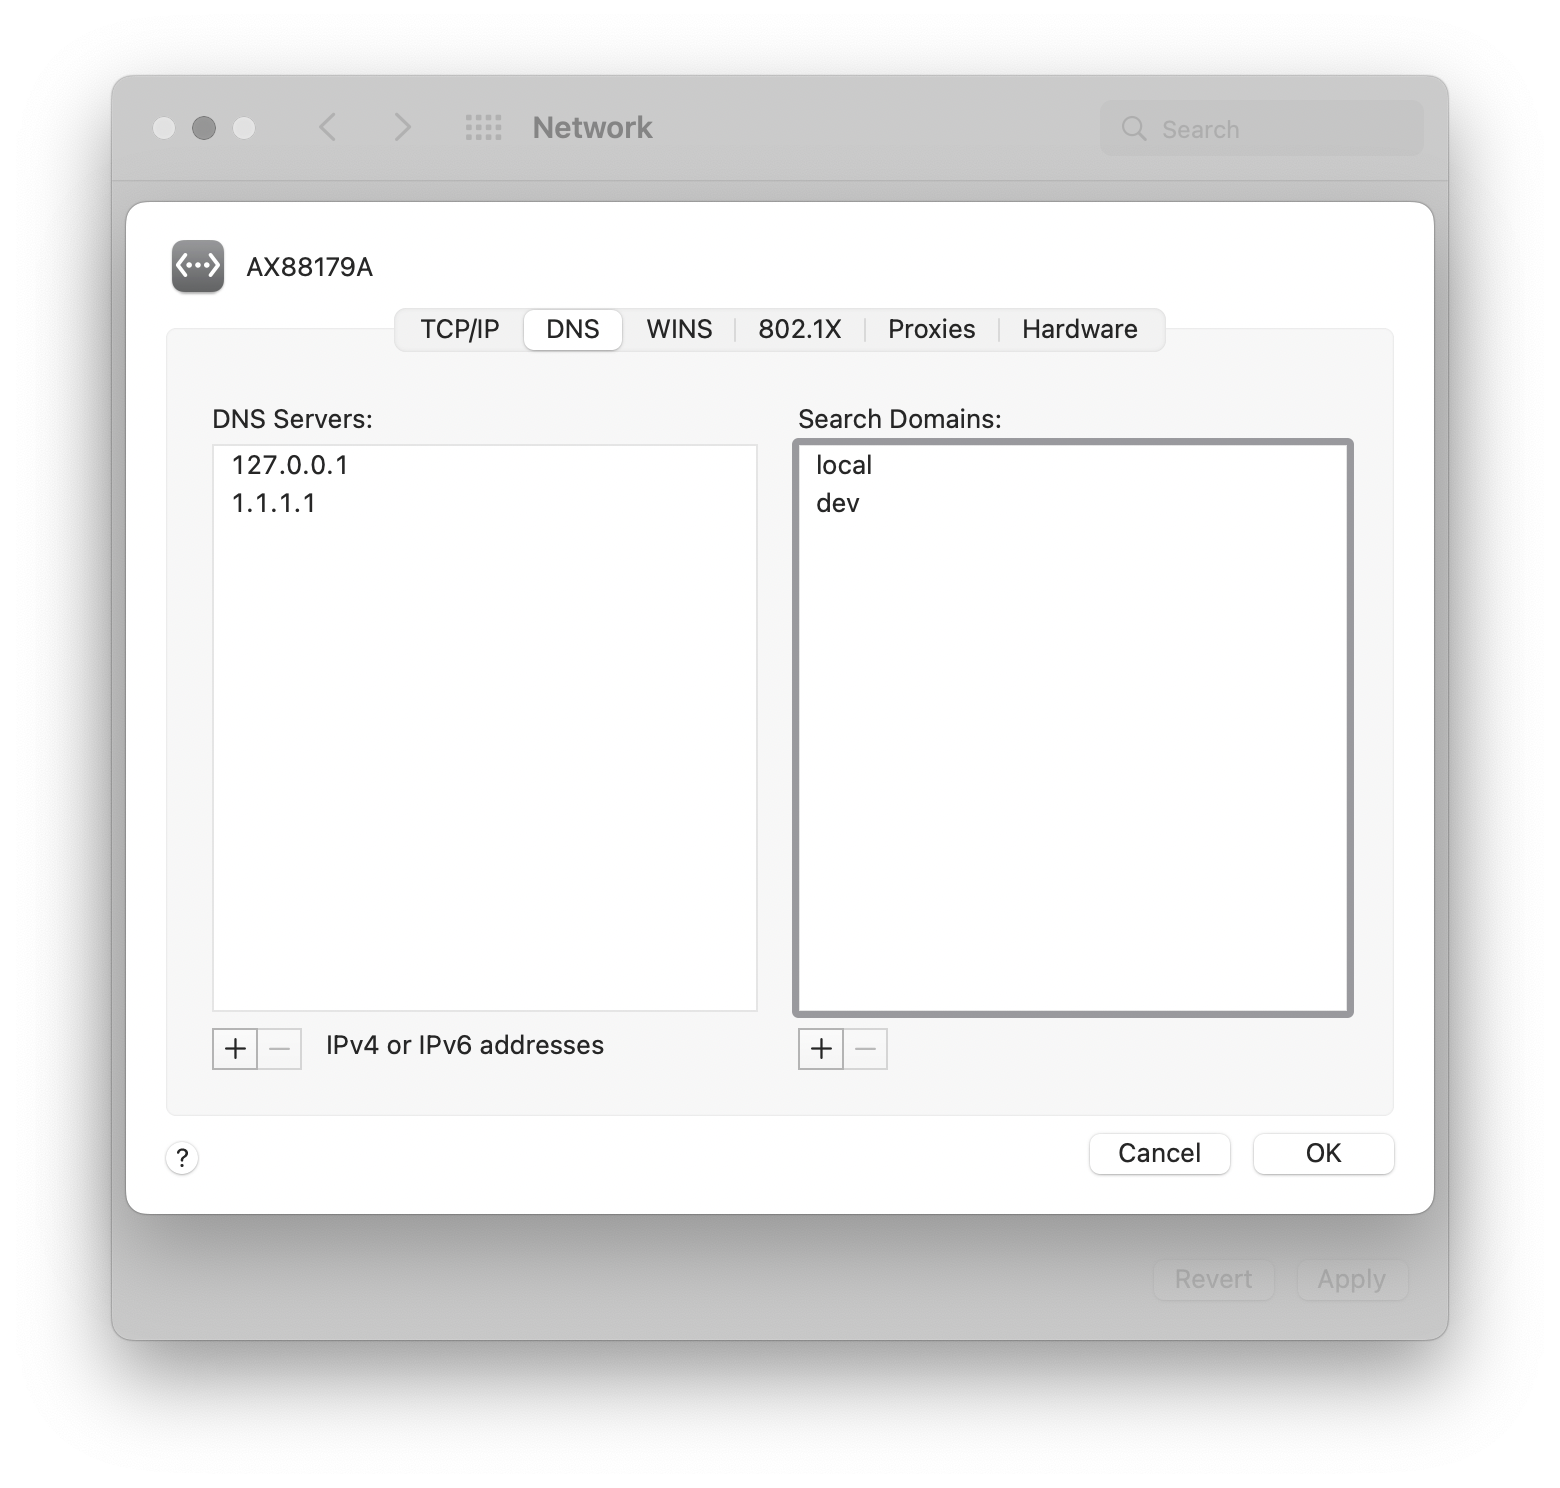
On the right side of the image there is a list for search domains, specifically for Mac, users could put domain suffix, Mac would search by appending the search domains. For example, when resolving demo, the operating system would search for demo.local and demo.dev in addition to demo.
The following shows what looks like when resolving domains and hostnames.
dnsmasq.d ➤ nslookup wangxm.com
Server:		127.0.0.1
Address:	127.0.0.1#53

Non-authoritative answer:
wangxm.com	canonical name = demo.wangxm.com.
Name:	demo.wangxm.com
Address: xxx.xxx.xxx.xxx

dnsmasq.d ➤ nslookup demo.dev
Server:		127.0.0.1
Address:	127.0.0.1#53

Name:	demo.dev
Address: 192.168.0.2Conclusion
In this post, a bare minimum tutorial is presented on how to use dnsmasq, there are a few things to be correctly configurated before users could take advantage of this software. Additional automation processes could be done within config files so that one could dynamically change certain aspects of the resolve process.
Leave a Reply